Tag Archives: baking

Lone Star Chilli and Cheese Bread – yeehah!

Jon has been nagging me to have a go at this idea since we left Houston six years ago…. we used to go to this amazing supermarket called ‘Central Market’ and he used to buy a loaf of this bread each week, without fail. They baked it fresh on the premises and it was incredibly yummy. Now that I feel more competent at making bread I thought I would have a go!
Lone Star Chilli and Cheese Bread

I used the same method and bread ingredients as in my previous ‘Breadilicious’ post: http://kidandkitchen.com/2011/08/20/breadelicious/ ;apart from I used 100% white bread flour, no granary this time

I added 1 1/2 cups grated cheddar and 1 large jalapeno from our garden (deseeded and finely chopped) to the main mix – not the sponge.

I now have a very happy husband (and daughter)…. although a fantastic result at Weight Watchers is looking less likely now! Have frozen the rest to help resist temptation and to prevent the scales from breaking!

Lone Star Bread

A slice of pure heaven!

1 Comment

Filed under baking with children, bread, trying new foods

My latest attempt at a loaf – now sandwich ready!

image

Leave a comment

Filed under Uncategorized

Breadelicious!

Hooray for handmade bread – it is addictive to make as well as to eat! This week we made 1/2 granary, 1/2 white flour. Abbie and I are loving making our weekend bread and this lazy method fits in well with our routine…..

1.30pm – made the sponge (bit of the flour, water and yeast left to rise) and it in the airing cupboard – then it was off to Glee 3D and to drop Jon off at the station for his boys’ weekend (or Geekfest as they are calling it!).

Click to print off recipe

5.00pm – continued to make the dough, adding the remainder of the ingredients and did a good bit of kneading before putting the dough in the airing cupboard to rise.

We kneaded through 3 Warblers' songs

8.00pm – with Abbie in bed, I started on the next stage – thumping the dough down and shaping it to make a loaf. I spray the top with a little water and dust with flour – I use a shaped stencil to decorate. This takes a few minutes and then it’s onto a baking tray, cover with a teatowel and leave for the morning.

7am – Couldn’t believe that I was up before Abbie this morning – must have been the excitement of baking! I heaated the oven up to 200C (fan) and baked the loaf for 35 minutes. The delicious smell of bread had roused my daughter by then who came down with the words “I’m hungry”…. Neither of us are particularly patient people so we ate the bread, still hot with butter and jam. I broke into my rose petal jam, bought last year in France – heaven!

Can you smell it from there?

Here are the remainder of the instructions for the sponge method…

2 Comments

Filed under baking with children, bread

Baking Sourdough at Denver Windmill

image

There's something incredibly romantic about baking bread inside a working windmill

Happy Birthday Mummy….. we finally went on Mum’s birthday treat 7 months after her birthday, to Denver Windmill. My mum is the best baker that I know, bakes all her bread, rolls, ciabattas and focaccias by hand and all taste amazing. BUT she has been stumped by Sourdough, even with the help of Hugh Fernley-Whistingstall’s ‘foolproof’ method. So being the determined woman that she is, she asked if she could have a class learning how to make the bread that has eluded her, for her birthday and the best bit was that I got to come along as well. I have had mixed results with bread… don’t think that my KitchenAid is particularly good at kneading, so I was keen to learn as well.

Martin (our teacher) was fantastic, explaining secret tricks to making better bread (any bread) which I shall be trying out this week – it’s called the ‘sponge method’ – too long to write in detail- you put a little of the flour, water and yeast to ferment over night, before adding to the rest of the mix and making bread as usual- this is a good link: http://www.videobread.com/tips8.htm

Anyway – we discussed the 2 methods to making the ‘sponge’ for sourdough – this is the bit where you attract ‘wild’ yeasts to your mixture and lactobacillus bacteria which provide the sour taste. We used a sponge from an accelerated method in which a small part of baker’s yeast is also added to kick start the fermentation. I also learned that it was important to add a bit of lemon juice to any breadmix as this adds ascorbic acid (Vit C) which helps the bread to develop a wonderful crumb.

I am going to make my sponge this week – so I will write how I do this later…

Martin gave us our ingredients and we got going:

Strong white flour – 375g
Salt – 10g
Warm Water (few drops of lemon juic added) – 300g
Rapeseed oil – 28g

Mix first, then add…

The leaven – Mixture of…

Wheat sourdough starter – 100g – (this is the bit that has fermented over days)
Strong white flour – 125g
Warm water – 75g

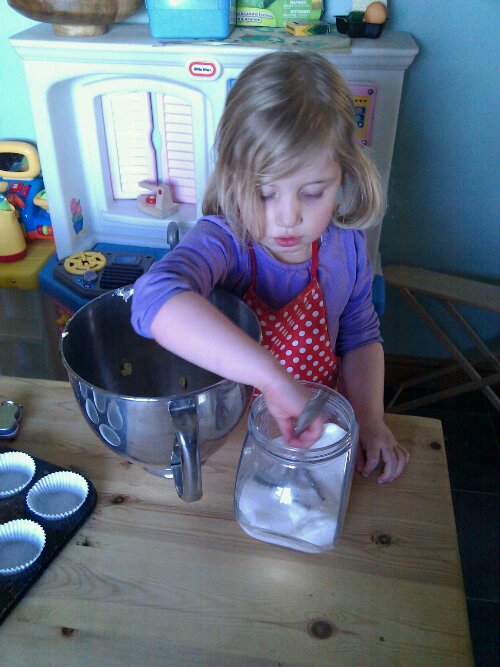
Mix all together and knead (pummel and stretch) on a floured surface (to stop the dough from sticking) for 10 mins – this seems like ages – put some music on to sing along to – should be 3-4 songs

image

Mum kneading...

Cover the dough and leave for 1 hour

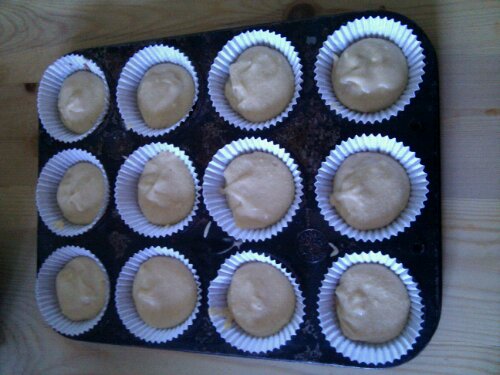
Knock the dough back – punch it! – form the dough into the shape required – place onto a baking sheet coated with baking parchment, coer again and leave in a warm place for 3-5 hours until the dough has expanded. Dust the loaf and bake for 35 mins at 220C.

image

All the loaves ready to go into the oven.... how cool is the floured windmill logo!

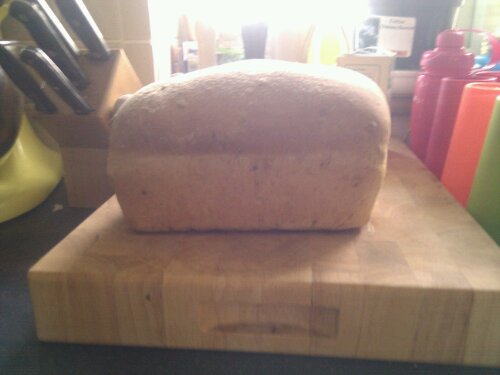
I was so pleased with my loaf, especially considering my past attempts at bread….. Mum’s unfortunately cracked, as did many of the rye loaves, but I am sure that she will have another go this week.

image

Incredibly proud of my handmade loaf...

image

The best bit - taking home our bread...

Mum and I picked up some beautiful taramasalata from Waitrose and a new lemony Bistro salad that they were doing… a perfect late lunch after our wonderful day!

image

A celebration - sourdough bread and toast (even better), taramasalata and salad

Leave a comment

Filed under bread, Eat local

Don’t be a gooseberry – bake a cake and then everyone will be your friend!!

On Sunday, my friend Vic hosted a wonderful 4th birthday party for her daughter, Mia. Vic, being Vic, had totally gone to town, in addition to catering for over 40 hugely excited children. There was fairy crown making, fairy wand making, bee/ladybird/dragonfly making; I was helping children to ice and decorate their own cupcakes and the long-suffering husband named himself the ‘bouncy castle fascist’ – monitoring how many children were on at one time and counting down their bouncing time!

How do you cater for that many children and their parents?? Vic made all children a sausage in a roll, served up veggies with houmous and crisps; finishing up with birthday cake! Parents were treated to a range of homemade cakes made by Vic, family and friends and the cake below was my offering – a gooseberry cake made with the gooseberries Abbie and I found at Groveland farm shop last Wednesday.

My gooseberry cake… – makes a large loaf tin shaped cake – easy for party slicing
280g/10oz self-raising flour
1 tsp baking powder
75g/3oz caster sugar
100g/4oz demerera – you’ll need an extra bit at the end for sprinkling to make the top crunchy (always do this on my loaf cakes)
100g/4oz soft soya marg
2 eggs
tiny splash of vanilla extract (or use vanilla sugar in place of caster)
1 large punnet gooseberries (sorry I didn’t weigh them) – top and tail

  • Preheat oven to 180C. Line your loaf tin with parchment and grease the sides
  • Stew the gooseberries by bringing to boil and then simmer for 5 mins until soft and popping out of their skins
  • Beat the dry ingredients to combine
  • Add marg, eggs, vanilla  – beat lightly until it looks like cake mixture
  • Add all but 1 cup of the stewed gooseberries (if you want some for a pudding) – fold in
  • Pour in to loaf tin and sprinkle demerera sugar on top
  • Bake for 45 mins and check that it is cooked by inserting a skewer into the middle – it should come out clean – if not bake for 5 mins and try again!
  • Cool in tin for a little while and then remove to a cooling rack (or take it to the party in the tin as I did and turn it out there!
  • Slice and enjoy!
image

Gooseberry cake, stewed gooseberries and Nigel Slater's amzing mascarpone cream

Abbie was dying to try gooseberries; I think she has had them before, but couldn’t remember – so that was an interesting experiment while we made the cake. Luckily she LOVED them! So I snaffled a few leftover pieces of cake from the party and served it up for our pudding.

I served it up warm with some stewed gooseberries and made Nigel Slater’s Mascarpone cream to go alongside – trust me when I say this is AMAZING!  A no-cook custard which can be whipped up in a few mins.

Beat 2 egg yolks with 2 tblspns caster sugar; add few drops vanilla and 250g mascarpone, beat until smooth and custard-like! If it weren’t for the calories, I’d make it everyday!

Unfortunately I think we will have to rely on Grovelands for our gooseberries – have counted and we have 7 berries on our bush (still in trauma from last year’s frost obviously). I may be back this week!!

2 Comments

Filed under baking with children, puddings

Happy birthday Abbie! – Dairy-free Marshmallow cupcakes – a sugartastic, once a year treat!

image

She's a big 4 year old now!!

Abbie is 4 today and so, like the wonder-mother that I aspire to be (hasn’t happened yet!)…. I made cupcakes for her class – ‘Marshmallow Cupcakes’ from the Hummingbird Bakery cookbook. Abbie sat scouring through various books and finally settled on these ones, so that is what made! One of her friends from nursery has a cow’s milk allergy and I understand that as I had a casein intolerance before I was pregnant with Abbie (pregnancy took it away weirdly, although I go back on soy whenever I have any asthmatic probs). So I made dairy free versions and tampered with the sugar content a little as I was using sweetened soy milk.

I was thinking about the sugar content of these cakes pretty much the whole time I was making them, as I was shocked that on Jamie’s Food Revolution, children in LA schools are given a carton of flavoured milk every day which contains 24g of sugar. I calculated the sugar in each cupcake and was equally horrified to find that each cupcake contained a whopping 30g of sugar!! I reconciled myself with the fact that birthdays only come around once a year….. If I hadn’t have put the frosting on the cake, the sugar content would have only been 8.5g, meaning that every child who is drinking a carton on flavoured milk is consuming the sugar equivalent of 4 un-iced cupcakes a day! Would you let your school deliver this? Looking forward to the next instalment tonight… C4 10pm!

Anyway to the recipe….

Marshmallow cupcakes – adapted from the Hummingbird Bakery cookbook Makes 24 (for a class!)

240g plain flour
200g caster sugar
3 tsp baking powder
a pinch of salt
90g veg/soya margarine, at room temperature
240ml sweetened soy milk
2 eggs
1/2 tsp vanilla extract

For the frosting:

vanilla frosting (500g icing sugar beaten for 5 minutes with 160g veg/soya margarine, 50ml soya milk and a tiny splash of vanilla extract)
200g mini marshmallows
Edible glitter, to decorate
2 12-hole cupcake tray, lined with paper cases

1.Preheat the oven to 170°C (325°F) gas 3.
2.Put the flour, sugar, baking powder, salt and margarine in a freestanding electric mixer with a paddle attachment (or use a handheld electric whisk) and beat on slow speed until you get a sandy consistency and everything is combined. Gradually pour in half the soy milk and beat until the milk is just incorporated.
3.Whisk the egg, vanilla extract and remaining soy milk together in a separate bowl for a few seconds, then pour into the flour mixture and continue beating until just incorporated (scrape any unmixed ingredients from the side of the bowl with a rubber spatula). Continue mixing for a couple more minutes until the mixture is smooth. Do not overmix.
4.Spoon the mixture into the paper cases until two-thirds full and bake in the preheated oven for 20–25 minutes, or until light golden and the sponge bounces back when touched. A skewer inserted in the centre should come out clean.
5.Leave the cupcakes to cool slightly in the tray before turning out onto a wire cooling rack to cool completely.
The next bit is optional – I did it and at point of trying to get sticky marshmallow into a sponge, I wished I hadn’t! Put 24 big marshmallows in a heat-proof bowl over a pan of simmering water. Leave until melted and smooth. When the cupcakes are cold, hollow out a small section in the centre of each one and fill with a dollop of melted marshmallow. Leave to cool.

image

I started putting metled marshmallow inside, but frankly it was too fiddly and sticky, so I stopped!

6.Stir the mini marshmallows into the vanilla frosting by hand until evenly dispersed.
7.Spoon the frosting on top of the cupcakes and decorate with edible glitter.

image

Frosting and edible glitter on!


This recipe should probably have a warning on for diabetics….. but I have to say they look and taste sensational. I was just so pleased that Harry could join in the fun as it is horrible when everyone else is having something and you can’t….. clearly a feeling I have built up over years of casein intolerance and dieting!!

image

Very sugary... but how gorgeous?!

Leave a comment

Filed under baking with children, puddings

What do you do when you have no energy, but your daughter is bouncing off the walls??

Answer – to the kitchen! I was able to sit, with the occasional move whilst we weighed, mixed, poured and baked Nigel Slater’s ‘Lemon Frosted Pistachio cake’; surely guaranteed to lift my spirits and put a smile on my face. Abbie is becoming suddenly more independent in the baking arena and now insists on trying to do everything herself…. cracking eggs has definitely improved – I only had to retrieve 3 pieces of shell (a definite improvement on previous attempts!)

Weighing and measuring...

If you could hear this photo it would say...'Ta da!'

Juicing the orange - luckily I only need 2/3 of its juice

This was a great recipe for trying new things – ‘green nuts’ went down very well, although she came a cropper later when sneaking a naughty one as my back was turned…. tried to eat the whole thing, shell and all!! That’ll teach her! Abbie also enjoyed pinches of ground almonds (so different to how whole ones taste) and smelling the rosewater which she said smelled ‘flowery’.

Thank goodness also for Jonts, who probably wished he hadn’t called to say he was coming home, as he was greeted with a ‘please could you just……’ (this happens quite a lot). Anyway, he was the cake’s hero as without him and the bottled lemon juice, there would have been no icing!

GORGEOUS!

This cake is GORGEOUS!… we ate it with berries and creme fraiche. I made 2/3 of the recipe and we were only supposed to eat a third of the cake. Confession: there is only half left and I am not sure that it will make it through the evening – I am in bed and I can almost hear Jon sliding a plate from the cupboard…. opening the fridge door….. Hero or not, there had better be a piece for Abbie and I tomorrow or he’s in big trouble!

Abbie has seconds and then asked to share my second piece! Cheeky monkey! Of course I let her - weak!

Have to say, I am a Slater convert at the moment as I have not had any kitchen disasters with any of his recipes and they have all been simply delicious. In fact I am at present thinking up a name for all Slater followers…. maybe I am a ‘Slaterite’, ‘Slatertater’ or a ‘Slaterplater’? All lame I know! I’m sure you can do better……

LEMON-FROSTED PISTACHIO CAKE (from Nigel Slater’s ‘The Kitchen Diaries’)
serves 10-12

250g of butter
250g of caster sugar
3 large eggs
100g of shelled pistachio nuts
100g of ground almonds
An orange
1 tsp of rosewater
60g of plain flour

Icing:
100g of icing sugar
2 tbsp of lemon juice
Preheat the oven to 160° C. Line the bottom of a non-stick 22cm cake tin with baking parchment.
Cream the butter and sugar until very light and fluffy. Add the eggs one at a time, beating between adding each egg. Blitz the pistachios in a food processor to turn them into fine crumbs and then add them, along with the almonds, to the butter, sugar and eggs. Add the zest and the juice of the orange and then stir in the orange blossom water and, finally, fold in the flour.
Pour the mixture into the tin and bake for 50 minutes, covering the top lightly with foil for the final ten minutes. Check that the cake is done by inserting a skewer, it should come out quite clean with no wet mixture stuck to it. Leave it to cool in the tin before turning out.

Make the icing by mixing the icing sugar and lemon juice together until smooth and then pour it over the cake. If you have any leftover pistachios use a few to decorate the top of the cake. Leave the icing to set and then serve and enjoy.

Leave a comment

Filed under baking with children, puddings

Malt loaf made new…. ML and butter pudding with a ‘nice cup of tea’ custard

I came home to find many items beyond their ‘best before’s and although I hate it when I throw away half a tub of creme fraiche or some wilted veg, I was determined to find a use for my stale malt loaf, still wrapped and a bit squidgy. I took inspiration from how I like to eat my malt loaf treat (spread with butter and accompanied by a cup of tea) and decided to make a variation on ‘bread and butter pudding’.

It came out fantastically well and we have all enjoyed eating this comforting pudding….. it takes it sweetness mostly from the malt loaf and so isn’t overly sweet. If you have a sweet tooth feel free to add a bit more sugar to the custard – I would rather have a scoop of vanilla ice cream to accompany it!

So.. to what I did!

1 stale malt loaf

Butter for spreading

100ml strong black tea (1 tea bag, squeeze it to make the tea strong)

Just under a pint of milk

2 eggs

Vanilla sugar for sprinkling (to taste)

  • Thinly slice the malt loaf and butter it on one side, place into a buttered dish, overlapping the slices
  • Make the tea and then top up with milk to make 1 pint, add the 2 eggs and whisk to combine
  • Strain the egg/tea mixture over the slices of malt loaf
  • Sprinkle with vanilla sugar and leave to soak for 30 minutes (preheat the oven to 180C during this time)
  • Bake for 30 minutes and cool for 5-10 mins before serving
image

Crunchy and malty on top, gooey smooth custard underneath - yum!

image

A bowl of velvety comfort

Leave a comment

Filed under baking with children, Leftovers made new, puddings

Jumping, juicing, jelly, jam tarts….. and all things that start with ‘j’!

Abbie was learning about the letter ‘j’ this week so when her friend, Lily, came to play I thought it would be great to theme the day, using this letter – just call me ‘alpha mother’!  After lunch and much JUMPING, we headed to the kitchen to JUICE the citrus fruits ready for the JELLY and then bake some JAM tarts ready for tea with Lily’s mum and little brother.  Abbie and Lily shared all the tasks really well and I think they did a fantastic job – do you agree?

image

Jumping.....

image

Jelly..... bashing the cardamon the most fun way I know!

Orange and Cardamon Jelly – Nigel Slater (from The Kitchen Diaries)

12 oranges, 1 lemon, 1 pink grapefruit

6 cardamon pods

8 sheets of gelatine

1 tsp sugar (optional)

  • Squeeze the oranges – you need just under a litre of juice – reserve for later.
  • Squeeze grapefruit and lemon – put into small pan with equal quantity of water
  • Remove 3-4 strips of zest from grapefruit and lemon and add to pan
  • Split open cardamon pods – can do this with the flat side of a knife (although much more fun with a hammer!) – add to the pan
  • Heat the pan until the juice bubbles – lid on, turn heat off and leave for 15 minutes
  • Slide the gelatine sheets into cold water – 1 at a time – leave to soften for 5 minutes
  • Pour juice, through a sieve, into a scrupulously clean bowl – reserve the cardamom seeds
  • Lift the softened gelatine sheets from the water and whisk into the warm juices until dissolved – it takes seconds
  • Add orange juice and stir thoroughly, making sure that every bit of gelatine has melted
  • Add reserved cardamom seeds – they will float around, apparently pointlessly, but will in fact discreetly give some of their flavour to the jelly as it sets
  • Refrigerate for 4-5 hrs

Enough for 6-8

image

Jam tarts.... rolling out the pastry

image

...adding jam

image

Jam and Jelly all done!


Jam Tarts – the easy way

I bought ready rolled pastry today – life is too short! Pre-heat oven to 180C.  Use a cutter just bigger than your tin ‘holes’ and cut 12 crimped  rounds to push into the dips.  Fill each with a small tsp of jam and bake for 10-12 mins – take tarts out of dips and cool on a rack. Child’s play!

Leave a comment

Filed under baking with children

Dolly mixture candy cupcakes…. why does pink icing taste better?

What a lovely afternoon! Seemed a shame to even come inside…. but as usual our stomachs ruled and we just had to make cupcakes for a tea time picnic on the grass!
We use the US recipe from Nigella’s ‘How to be a Domestic Goddess’ – bought whilst living there.  Using cup measures and tablespoons is really easy when you are 3, so Abbie can really feel like she is doing it all herself. If you would like the US conversion, let me know…

Link to the UK recipe: http://www.nigella.com/recipes/view/cupcakes-146

image

image

TOP TIP – Don’t over-fill the cupcake cases – half-fill at the most. When they are cooked and risen – chop any ‘moountain tops’ which are higher than the sides of the cases – that way you will have perfectly smooth icing tops.  Also a great treat for children while they are waiting for the whole iced cake – which will not be ready for another 20mins!  This is always the time when Abbie starts saying ‘I’m feeling a bit peckish Mummy, I’m feeling a little bit cakey!’.image

Abbie probably won’t eat dinner as she has consumed half her body weight in coloured icing. I use the coloured paste that you get from cake craft places – this is ‘Pink’, orange is made from ‘Pink’ and ‘Egg yellow’, Purple from ‘Pink’ and ‘Ice Blue’, the blue is ‘Ice Blue’ on its own – be warned, you only need a tiny touch of the end of a skewer with these to get colours these vivid – I put in too much, not downsizing for the fact I was doing quarter batches of icing.  I also used 12oz of sifted icing sugar, too much is better than too little, to ensure the cakes get covered.
image

The finished articles in all their brightly coloured splendour! image

Leave a comment

Filed under baking with children